NEWS
News information
Subcategory:
In the fast-paced world of quality assurance, keeping your measurement equipment in top form is crucial for consistent results. At Dongguan City Handing Optical Instrument Co., Ltd., we specialize in Instant Vision Measuring Machines and take pride in empowering our customers with durable, high-performance tools. Today, we're sharing practical maintenance guidelines to extend the life of your Instant Vision Measuring Machine, ensuring it delivers reliable non-contact measurements day after day.

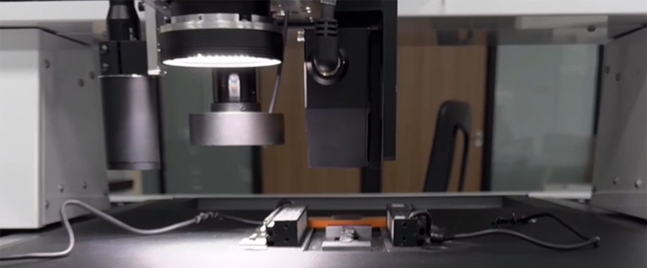
Instant Vision Measuring Machines, including our Horizontal Instant Vision Measuring Machine and Vertical and Horizontal Integrated models, use flash illumination and high-speed imaging to capture measurements in under a second—ideal for high-volume inspections of PCBs, molds, and machined parts. Proper care not only maintains accuracy but also minimizes downtime, helping you stay ahead in competitive markets.
Start with daily routines: Always power down and cover the machine when not in use to protect the optics from dust. Wipe the worktable and lens with a microfiber cloth and isopropyl alcohol (diluted 1:1 with water)—never use abrasive cleaners. For our Desktop Instant Vision Measuring Machine, check the alignment of the flash light source weekly; a simple recalibration via the built-in software takes just minutes and restores sub-micron precision.
Monthly, inspect the linear guides for smooth movement. Our Splicing Instant Vision Measuring Machines incorporate exposed linear encoders for enhanced resolution, so lubricating these with manufacturer-recommended grease prevents wear. Monitor environmental factors too—keep ambient temperature between 18-25°C and humidity under 60% to avoid thermal expansion errors. The encoders, paired with optical linear scales, are robust but benefit from this vigilance.
A compelling customer tale underscores these tips: A precision tooling firm in Southeast Asia adopted our one-key flash measurement system but initially faced intermittent accuracy dips due to overlooked cleaning. After implementing our guide, they achieved 99.8% uptime and cut calibration frequency in half. As a dedicated Instant Vision Measuring Machine provider, we include these protocols in every user manual, backed by our responsive support.
Investing time in maintenance translates to long-term savings and unwavering trust in your data. Whether you're using our VMS for 2D profiling or advanced splicing for larger fields, these steps keep performance sharp.
Ready to optimize your setup? Contact us at handing3d@163.com for tailored advice or spare parts. We're here to help your vision measuring journey shine brighter.
Han Ding offers a one-stop service from needs analysis, product solutions, usage guidance, to after-sales tracking

Address:No. 98, Zhen'an East Road, Chang'an Town, Dongguan City, Guangdong Province, China
Mobile:+86-130 3887 8595 / Aico Ding
Email:handing3d@163.com